Deutsch

Drake vs Sansha's Nation

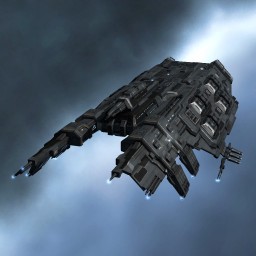
Drake

  • Battlecruiser
  • Missiles
  • shield tank

Missiles and a bonus to all shield resistances — the least demanding hull here.

Load Kinetic, tank EM and Thermal.

Orbits, 188 m/s. Signature 323 m. Capacitor lasts 5:10 min.

High 6/7

  • Heavy Missile Launcher IIScourge Heavy Missile
  • Heavy Missile Launcher IIScourge Heavy Missile
  • Heavy Missile Launcher IIScourge Heavy Missile
  • Heavy Missile Launcher IIScourge Heavy Missile
  • Heavy Missile Launcher IIScourge Heavy Missile
  • Heavy Missile Launcher IIScourge Heavy Missile
  • empty

Mid 6/6

  • Medium Shield Booster II
  • EM Shield Hardener II
  • Thermal Shield Hardener II
  • Shield Boost Amplifier II
  • EM Shield Amplifier II
  • Compact Thermal Shield Amplifier

Low 4/4

  • Damage Control II
  • Ballistic Control System II
  • Ballistic Control System II
  • Missile Guidance Enhancer II

Rig 3/3

  • Medium EM Shield Reinforcer II
  • Medium Capacitor Control Circuit II
  • Medium Core Defense Operational Solidifier II

Drones 5 in space

  • 5× Acolyte II, main flight
DPS effective235raw 415, Missiles 328, Drones 87
EHP65,569against this faction
Repair384HP/s effective, raw 59
CPU100 %624 of 625 tf
Powergrid57 %589 of 1,038 MW
EM85 %57 %
Thermal84 %43 %
Kinetic58 %0 %
Explosive65 %—
  • 1 high slot stays empty: no module that fits does better against the anomalies.
EFT block
[Drake, Sansha's Nation — Ratting]

Damage Control II
Ballistic Control System II
Missile Guidance Enhancer II

Medium Shield Booster II
EM Shield Hardener II
Thermal Shield Hardener II
Shield Boost Amplifier II
EM Shield Amplifier II
Compact Thermal Shield Amplifier

Heavy Missile Launcher II, Scourge Heavy Missile
[Empty high slot]

Medium EM Shield Reinforcer II
Medium Capacitor Control Circuit II
Medium Core Defense Operational Solidifier II


Acolyte II x5


Scourge Heavy Missile x1000

The 15 NullSec anomalies

The fit is built for these. It holds 1, 4 are tight.

15 rows
What holds comes first, then by bounty.
Site
English client
Site
German client
TankHeaviest wave
DPS vs repair
Clear
without warp
Bounty
ISK
Layout
Sansha Rally PointVersammlungsort der Sanshaholds281 vs 3656:01 min2.0M – 2.8M
Sansha HubSansha-Knotenpunkttight571 vs 18019:59 min11.9M – 14.9M
Sansha PortHafen der Sanshatight477 vs 24511:01 min5.6M – 9.0M
Sansha Hidden DenGeheimes Sansha-Verstecktight674 vs 21613:43 min5.0M – 6.6M
Sansha Forsaken DenEinsames Sansha-Verstecktight413 vs 22013:21 min4.0M – 5.8M
Sansha Forsaken SanctumSansha Verlassenes Heiligtumfails1,193 vs 12856:07 min49.5M – 52.5M
Sansha HavenZufluchtsstätte der Sanshafails1,130 vs 13052:56 min37.6M – 48.2Mvariants
Sansha SanctumHeiligtum der Sanshafails933 vs 12954:55 min44.1M – 48.0Mvariants
Sansha Forsaken HubEinsamer Sansha-Knotenpunktfails608 vs 13643:47 min31.4M – 39.9M
Sansha Forlorn HubVerlassener Sansha-Knotenpunktfails1,085 vs 14138:50 min24.4M – 33.3M
Sansha Hidden Rally PointGeheimer Versammlungsort der Sanshafails948 vs 14336:26 min22.9M – 24.3M
Sansha Forsaken Rally PointEinsamer Sansha-Versammlungsortfails531 vs 15827:22 min17.4M – 22.1M
Sansha Hidden HubGeheimer Sansha-Knotenpunktfails1,014 vs 14039:32 min19.6M – 21.8M
Sansha Forlorn Rally PointVerlassener Versammlungsort der Sanshafails881 vs 15329:43 min15.8M – 17.9M
Sansha Forlorn DenVerlassenes Sansha-Versteckfails676 vs 17820:36 min11.0M – 11.8M

Heaviest wave: damage that lands against what the repair absorbs. Holds means with 25 % margin.

Other sites with Sansha's Nation (16): DED complexes and escalations
16 rows
Not what the search aimed at: the fit is not built for these.
Site
English client
Site
German client
TankHeaviest wave
DPS vs repair
Clear
without warp
Bounty
ISK
Layout
Sansha Acclimatization FacilitySansha Acclimatization Facilityholds210 vs 3741:02 min587,500 – 663,442pockets
Sansha Forlorn HideawayVerlassener Sansha-Unterschlupfholds105 vs 3731:18 min419,625 – 468,000
Sansha Military OutpostSansha-Militäraußenpostenholds67 vs 38541 s145,750 – 445,000pockets
Sansha Forsaken HideawayEinsamer Sansha-Unterschlupfholds182 vs 3763:13 min333,000 – 444,750
Sansha Hidden HideawayGeheimer Sansha-Unterschlupfholds70 vs 37451 s196,875 – 243,000
Sansha RefugeZuflucht der Sanshaholds92 vs 3691:00 min118,125 – 207,189variants
Sansha BurrowSansha-Bauholds21 vs 38321 s37,500 – 87,000
Sansha HideawaySansha-Unterschlupfholds20 vs 39115 s21,375 – 44,250variants
Sansha's Rally PointVersammlungsort der Sanshatight258 vs 2619:48 min3.4M – 4.6M
Sansha's Nation Occupied Mining ColonyVon Sansha's Nation besetzte Bergbaukolonietight722 vs 3616:08 min3.3M – 3.6Mpockets
Sansha's Command Relay OutpostSansha-Kommandorelais-Außenpostentight301 vs 3714:06 min297,750 – 511,500pockets
Sansha War Supply ComplexSansha-Kriegsversorgungskomplexfails1,768 vs 9965:54 min40.2M – 60.2Mpockets
Sansha Military Operations ComplexKomplex für Militäroperationen der Sanshafails1,388 vs 12857:20 min29.9M – 59.0Mpockets
Centus Assembly T.P. Co.Centus-Fabrikationsanlagefails1,727 vs 13150:33 min23.1M – 57.9Mpockets
Sansha Prison CampGefangenenlager der Sanshafails1,652 vs 15628:33 min11.9M – 30.7Mpockets
Sansha's Nation Neural Paralytic FacilitySansha`s Nation Paralytisches Nervenzentrumfails1,542 vs 15628:24 min16.6M – 17.2Mpockets

Not calculated: ewar, locking and warp time, several waves at once. Skill plan