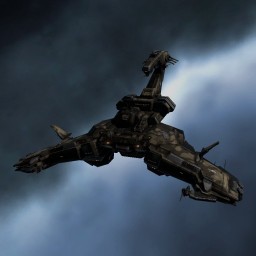
Rattlesnake
- Battleship
- Drones and weapons
- shield tank
Drones and missiles at once; the most expensive of the non-Marauder hulls.
Load EM, tank EM and Thermal.
Sits still and deploys drones, 118 m/s. Signature 450 m. Capacitor lasts 4:56 min.
High 6/6
 Cruise Missile Launcher IIInferno Cruise Missile
- Cruise Missile Launcher IIInferno Cruise Missile
- Cruise Missile Launcher IIInferno Cruise Missile
- Cruise Missile Launcher IIInferno Cruise Missile
- Cruise Missile Launcher IIInferno Cruise Missile
 Drone Link Augmentor II
Mid 7/7
 Large Shield Booster II
 EM Shield Hardener II
 Thermal Shield Hardener II
 Heavy Capacitor Booster IICap Booster 3200
 Drone Navigation Computer II
- Large Shield Booster II
 Shield Boost Amplifier II
Low 6/6
 Drone Damage Amplifier II
- Drone Damage Amplifier II
- Drone Damage Amplifier II
 Co-Processor II
- Drone Damage Amplifier II
 Ballistic Control System II
Rig 3/3
 Large Warhead Rigor Catalyst II
 Large Warhead Flare Catalyst II
- Large Warhead Flare Catalyst II
Drones 2 in space
 4× Praetor II, main flight
 5× Hobgoblin II, second flight, for frigates and what the main flight hits poorly
DPS effective753raw 1,115, Drones 698, Missiles 417
EHP97,392against this faction
Repair574HP/s effective, raw 188
CPU97 %950 of 976 tf
Powergrid73 %9,075 of 12,500 MW
EM64 %53 %
Thermal71 %47 %
Kinetic52 %0 %
Explosive60 %0 %
Against the faction's 14 NullSec anomalies: holds 2, tight 9. 31M ISK/h in the best three
EFT block
[Rattlesnake, Blood Raiders — Ratting]

Drone Damage Amplifier II
Drone Damage Amplifier II
Drone Damage Amplifier II
Co-Processor II
Drone Damage Amplifier II
Ballistic Control System II

Large Shield Booster II
EM Shield Hardener II
Thermal Shield Hardener II
Heavy Capacitor Booster II, Cap Booster 3200
Drone Navigation Computer II
Large Shield Booster II
Shield Boost Amplifier II

Cruise Missile Launcher II, Inferno Cruise Missile
Cruise Missile Launcher II, Inferno Cruise Missile
Cruise Missile Launcher II, Inferno Cruise Missile
Cruise Missile Launcher II, Inferno Cruise Missile
Cruise Missile Launcher II, Inferno Cruise Missile
Drone Link Augmentor II

Large Warhead Rigor Catalyst II
Large Warhead Flare Catalyst II
Large Warhead Flare Catalyst II


Praetor II x4
Hobgoblin II x5


Inferno Cruise Missile x1000
Cap Booster 3200 x3